Overview
Replay Media Splitter is a really easy way to extract or remove portions of audio and video files. With a visual display, and an easy way to include and exclude segments of your media, you'll be slicing and dicing video and audio files in minutes.
Replay Media Splitter supports these popular video and audio formats:
- AVI
- WMV
- ASF
- WMA
- MP3
- MOV
- MP4
- MKV
If your media is not in one of these formats, use a conversion tool like Replay Converter.
Here's a quick summary of the editing process:
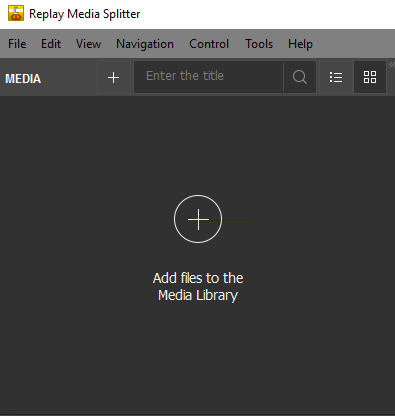
- Load one or more media files into the Media Library to use in your project.
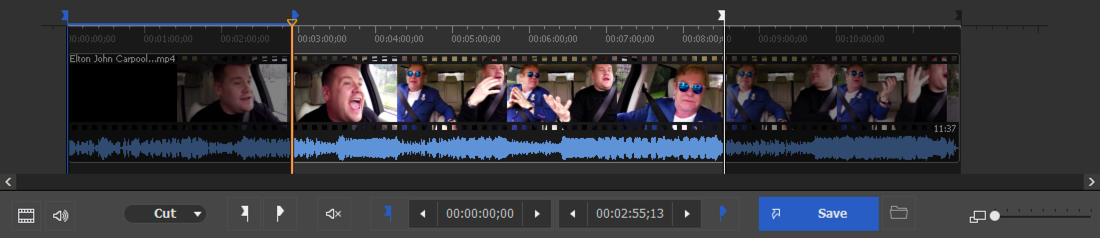
- Add Markers to split your media into Segments.
- Include or exclude segments.
- Output the resulting file.
Hint: Position the mouse arrow over any button to see a hint about what the button does.
Read on for the details...
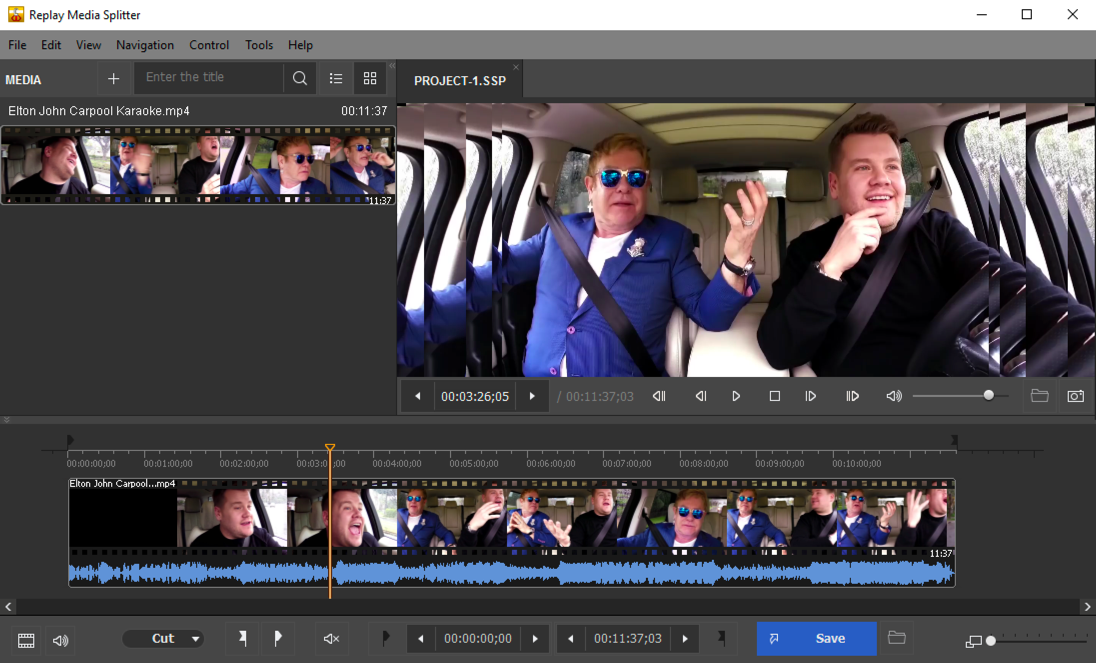
How to Split a Media File
Splitting is the process of dividing your video files into parts. For example, you can cut out a piece of video with undesired scenes (such as ads or commercials). The splitting process leaves source files intact saving the result in the destination file folder. Here are the basic steps for editing audio and video files:
- You'll need to load a file to edit first. Click the Add Files to the Media Library button, then pick a file from the your PC. The Media Library can contain more than one file for a project, so long as they are of the same file format.
- You can now drag files for editing from the Media Library to the timeline. To place several files on the flexible timeline drag them to the right area of timeline after each file.
- Next you'll use the Splitting Controls to determine fragments of your video that will be either included or excluded from your final movie. Here's a rundown of the splitting controls and their functions:
Button Function Keyboard Shortcut 
Add Beginning Marker: Adds a new start marker to the current slider cursor position. M 
Add End Marker: Adds a new end marker to the current slider cursor position N 
Set Audio Silence: Adds audio silence to the selected fragment. 
Save: Starts the trimming or batch processing (if there are any tasks in the batch queue). CTL+T 
Output Folder: Click to browse to and set the Output Folder 
Left Marker Cursor Time Position: You can edit this value manually. 
Right Marker Cursor Time Position: You can edit this value manually. 
Zoom: Increase or decrease the slider timeline resolution to make editing markers easier to see. NumPad+
Numpad-
Storyboard On/Off: Display or hide the storyboard Audio Wafeform On/Off: Display or hide the audio waveform. 
Cut/Keep: Choose your mode of editing. When set to Cut, the selections will me marked for removing. When set to Keep, the selections will be kept and the unselected portions will be discarded.
How to Navigate Media
Now that you know how to do basic editing, it's time to learn how to move the selector to important parts of the audio or video file. Replay Media Splitter has a lot of really handy ways to get to the important parts of any media file. Here's everything you need to know about navigating:
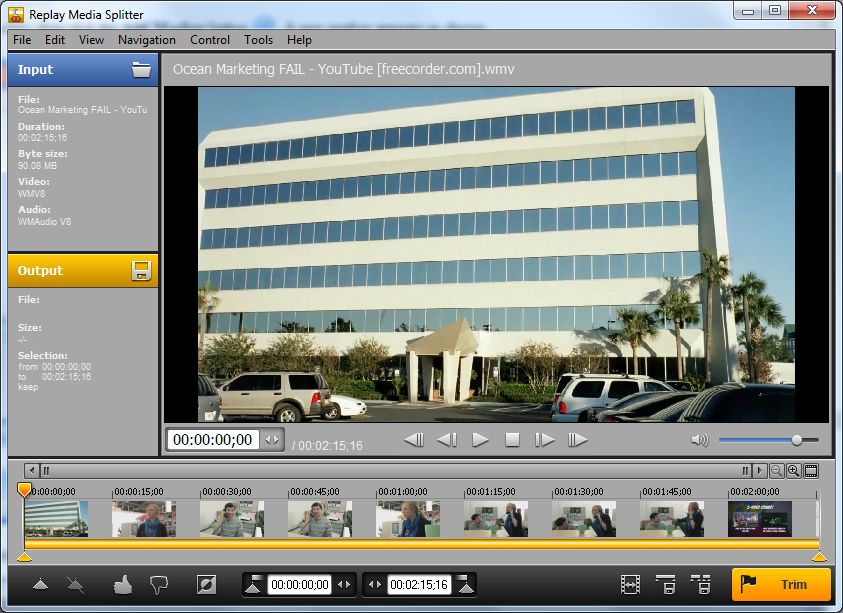
Navigating from the Navigation Bar

Navigation controls are designed for navigation through an open source media file. Using these controls, you can start and stop playback, pause it or search for the necessary position forward and backward. Also, the current position and total duration are displayed.
| Button | Function | Keyboard Shortcut |
 |
Previous K Frame | Left Arrow |
 |
Next K Frame | Right Arrow |
 |
Play/Pause | |
 |
Pause | |
|
Previous Frame | CTL + Left Arrow |
|
Next Frame | CTL + Right Arrow |
 |
Slider Cursor Time Position. You can edit this value manually. | |
 |
Total File Length |
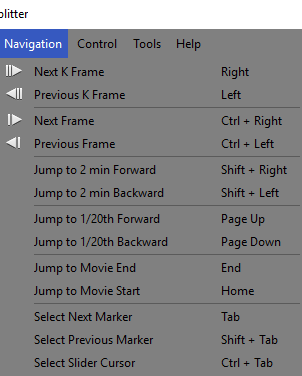
- The Navigation menu lets you move forward and back in various handy increments, and also gives you a quick reference to the various keyboard shortcuts:
About K-Frames
The left and right arrows move to the previous or next K-Frame. K-Frames are significant points of transition in a video file - usually the start of a new scene or camera shot. Moving between K-Frames is an efficient way to locate important segments quickly.
Here's the technical side of K-Frames. Video files are a series of images. When video files are compressed, rather than compressing each image in the video, some images are calculated as a difference from the previous image. If there are several seconds with little movement, for example, rather than saving each frame of the same image, the video compressor just saves the differences between each frame, which may be small. This leads to efficient compression. However, there are times when two adjacent frames are very different, such as a new camera shot. In that situation, an entirely new starting frame - the K-Frame - is brought into the compression process. Ensuing frames are again calculated as differences from the K-Frame.
How to Join Files
Use the Join Manager to join files with equal parameters. Specifically width/height of the frame and file type.
- To join files, click Join Manager from the Tools menu, then Show Join Manager:

The Join Manager will open: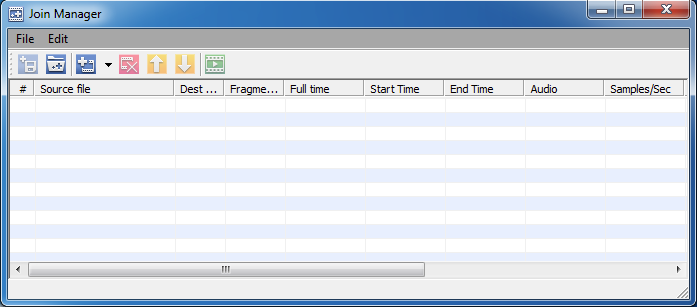
- Click the add button to add the files that you want to join. You can also drag-drop files into the window. Click the minus button to remove a selected file from the list.
- Order the files into the order that you would like them joined. Highlight an entry and use the arrow buttons to move that entry up or down the list.
- Click the Start Joining button and select a location to save your joined file.
Note: MP3 files will take on the MP3 tags of the last file in the list. If you would like your MP3 tags to be something different, you should edit tags of the joined file manually.
Credits
Replay Media Splitter was developed by Solveig Multimedia © Copyright All rights Reserved